
How to plane straight edges on a router table
When jointing, planing straight edges is a crucial step in the prep work of wood. Jointing, in woodworking, refers to aligning as well as making even sides so they can be collaborated. Due to the fact that wood is commonly offered with somewhat misshapen or distorted edges, planing is necessary to guarantee the sides are flawlessly straight or the joint will certainly not fit with each other properly. A table-mounted router with a flush cutting cutter, or a straight cutter installed, along with an adjustable guide fencing which can be countered, could be used for this task. The smooth, straight edges that will be left by the router will certainly enable you to produce an almost unnoticeable joint signing up with assemble. The guide fence can be positioned to ensure the cut is square as well as straight.
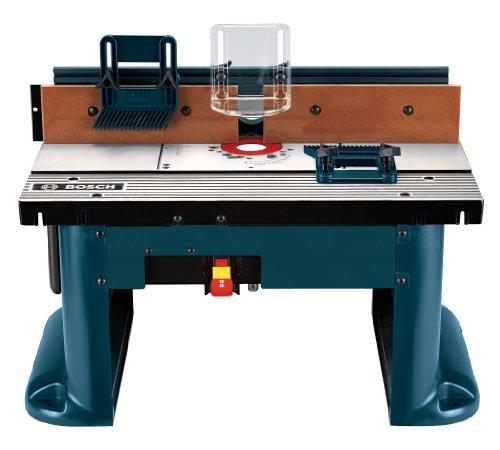
Step 1 - Set up router table
Install your cutter in the collet of your equipment as well as readjust its height. The cutter ought to be located high enough to ensure its reducing edges are totally in contact with the workpiece. To accomplish a completely straight edge, the left (out-feed) sub-fence should be placed somewhat further ahead compared to the right (in-feed) sub-fence. This can be done through different techniques, relying on the design of router table you own.
Get in touch with the maker's instructions to see if you could balance out the guide fence, and if so, how this is done. This can be called shimming and will ensure that the planed work surface is properly supported after it has actually taken a trip past the cutter as well as had material removed. With something like a straight side, straighten the outfeed sub-fence so that it is degree with the reducing sides of the trim cutter. This set up means that as the material is cut the new edge will certainly glide efficiently into the outfeed side of the fence and also be completely sustained.
Step 2 - Make technique cut
Prior to planing your workpiece, it's a good idea to evaluate the alignment of your fence by making a technique cut. Switch on your router and also run some scrap product across the table, utilizing the fencing to guide as well as support the piece. Feed the product from right to left. If you find that the edge of your test item is not right, a little adjust the setting of the fence before trying again.
Step 3 - Make cut.
When you are pleased with the set-up of your fencing, you prepare to cut your workpiece. Relocate the material especially very carefully as you start your cut until the cut side is being completely sustained by the outfeed side of the fencing. You may need to make a couple of passes, specifically if you have to take more than a couple of millimetres off an edge, but eventually, you need to be entrusted to a clean, straight side.
More Info:
Homemade table saw, router table, disc sander, jigsaw